 Pin it
 My daughter discovered Cookie Run Kingdom last winter, and suddenly our kitchen became her laboratory for recreating every character as an edible version. When she pointed at Pure Vanilla Cookie's serene, celestial design, I knew we had to make it happen. These sugar cookies with their glossy royal icing didn't just become a recipe—they became our weekly tradition, a reason to gather around the counter with piping bags and gel food coloring scattered everywhere. What started as "Mom, can we make cookies?" turned into something neither of us expected: a way to spend Saturday afternoons laughing at our slightly lopsided decorations while the kitchen smelled like pure vanilla heaven.
Last month, I made a batch for my niece's birthday party, and watching six-year-olds carefully choose which blue and white cookie they wanted felt like witnessing pure joy. One kid held his cookie up to the light like he'd discovered treasure, and honestly, that moment reminded me why baking matters—it's not just about sugar and flour, it's about creating tiny works of art that people want to preserve.
Ingredients
- All-purpose flour: The foundation of your dough; make sure it's fresh and measured by spooning and leveling rather than scooping, which can pack it down and make cookies dense.
- Unsalted butter: Room temperature is non-negotiable here—cold butter won't cream properly with sugar, and your cookies will be tough rather than tender.
- Granulated sugar: This is what gives your cookies structure and slight crispness at the edges while keeping centers soft.
- Pure vanilla extract: Don't skimp on this; imitation extract tastes thin and metallic compared to real vanilla, which brings warmth and depth.
- Meringue powder: The secret weapon in royal icing that keeps it stable and allows it to set hard; I buy it from baking supply stores rather than generic brands for consistent results.
- Gel food coloring: Unlike liquid coloring, gel won't thin out your icing and won't muddy your colors—I learned this after my first batch of murky blue icing.
Tired of Takeout? 🥡
Get 10 meals you can make faster than delivery arrives. Seriously.
One email. No spam. Unsubscribe anytime.
Instructions
- Prepare your dry ingredients:
- Whisk flour, baking powder, and salt together in a bowl and set aside—this ensures even distribution of the leavening agent so your cookies rise predictably.
- Cream butter and sugar until fluffy:
- Beat them together for a full 2–3 minutes until the mixture looks pale and cloud-like; this incorporates air that helps cookies achieve their tender crumb. If you rush this step, your cookies will be dense and cake-like.
- Add wet ingredients:
- Mix in the egg, vanilla, and milk until everything is combined and glossy. You'll smell that beautiful vanilla starting to bloom here.
- Gently combine wet and dry:
- Add the flour mixture gradually and mix only until the dough comes together—overmixing develops gluten and makes cookies tough. Stop as soon as you don't see streaks of flour.
- Chill the dough:
- Divide into two disks, wrap in plastic, and refrigerate for at least an hour (or overnight if you prefer). Cold dough is easier to roll and less sticky, which makes cutting shapes feel less frustrating.
- Preheat and prepare:
- Get your oven to 350°F and line baking sheets with parchment paper. Parchment prevents sticking and ensures even browning underneath.
- Roll and cut:
- On a lightly floured surface, roll dough to 1/4-inch thickness and use your cookie cutters. Work gently so shapes don't distort, and if dough gets soft, refrigerate it for 10 minutes.
- Space and bake:
- Place cookies an inch apart on baking sheets and bake for 10–12 minutes until edges just begin turning golden. Overbaking even by a minute makes them hard, so watch closely toward the end.
- Cool properly:
- Let cookies rest on the baking sheet for 5 minutes (they continue baking slightly from residual heat), then transfer to a wire rack to cool completely. Cooling on the sheet too long makes them stick; cooling on the rack prevents condensation from making them chewy.
- Make the royal icing:
- Combine powdered sugar, meringue powder, vanilla, and water in a bowl and beat on low speed until smooth and glossy. Start with 4 tablespoons water and add more a teaspoon at a time until you reach spreadable or piping consistency.
- Divide and tint:
- Pour icing into separate bowls and add gel food coloring one tiny dot at a time, stirring well. Colors intensify as they sit, so go light if you're unsure.
- Decorate with patience:
- Use piping bags for fine details or squeeze bottles for flooding larger areas. Let each layer dry before adding another so colors don't bleed together into muddy shades.
 Pin it
 There's something almost meditative about watching royal icing dry on cookies—you can't rush it, so you sit with what you've created and actually look at it. My daughter discovered she's oddly good at making perfect spirals while I tend toward chaotic splatters, and we've stopped trying to fix that and started celebrating our different styles instead.
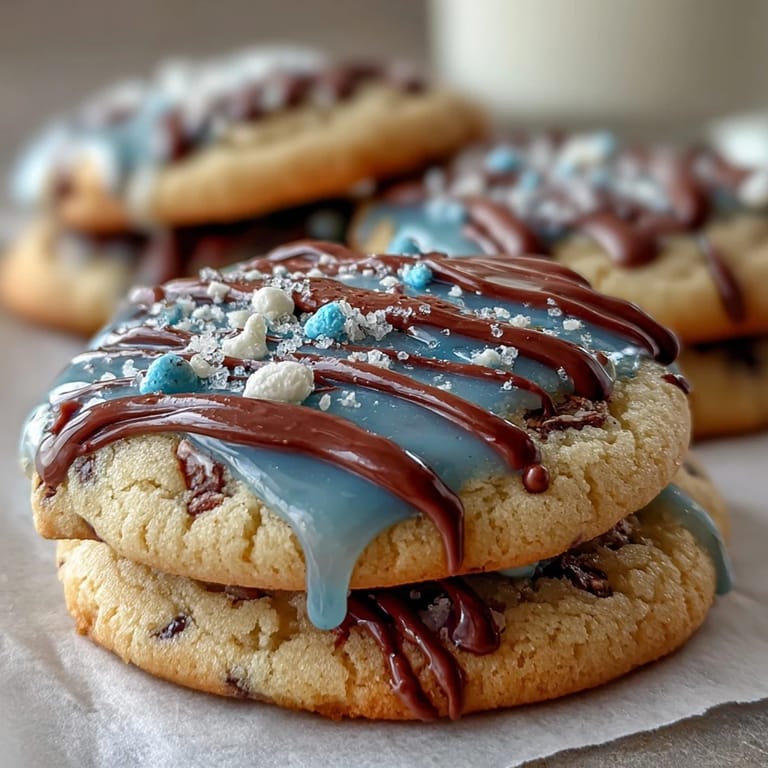
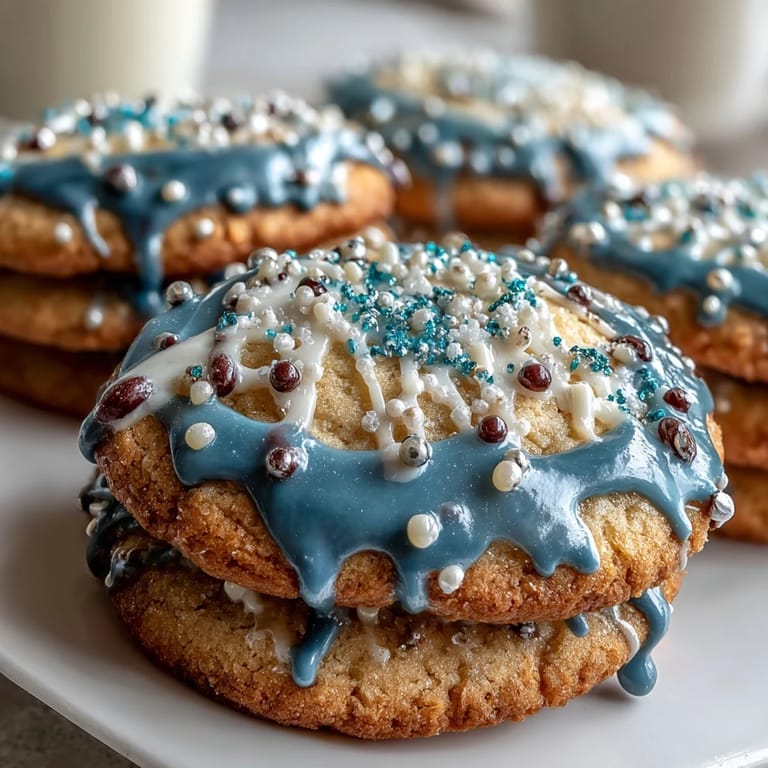
The Pure Vanilla Cookie Theme
If you're making these specifically for the Cookie Run Kingdom vibe, the color palette is everything—soft blues, pristine whites, and touches of gold or yellow create that ethereal, dreamy aesthetic. I discovered that using white as your base icing and then adding blue details creates depth, rather than trying to ice everything blue from the start. The cookies look infinitely more professional when you let white space breathe and use color intentionally for accents.
Storage and Gifting Strategy
One of the best parts about royal icing is that it hardens into a protective shell, making these cookies genuinely shippable and stackable in ways soft-frosted cookies never are. I've stacked them in clear bakery boxes with parchment between layers, and they've survived car rides and postal deliveries intact. An airtight container at room temperature keeps them fresh for a full week, though they rarely last that long in our house.
Common Decorating Mistakes and How to Avoid Them
When I first started piping royal icing, I made every mistake simultaneously—too much water made it drippy, too little made it impossible to pipe, and I decorated warm cookies that turned the icing into abstract art nobody asked for. Working slowly and letting layers dry between applications transforms chaos into intentional design. The piping bags that came with tips matter less than keeping your icing the right consistency and your hand steady, which honestly just requires practice and accepting that your first batch won't be gallery-worthy.
- Gel coloring should be added in microscopic amounts at first because one extra drop can shift your whole palette from soft blue to swimming pool blue.
- If your icing is too thick, add water drop by drop rather than pouring, or you'll end up thinning it out completely and having to start over.
- Let decorated cookies sit in a cool, dry place for at least 4–6 hours or overnight before packaging them, because icing that feels dry to the touch might still be soft inside.
 Pin it
 These cookies taught me that baking doesn't have to be perfect to be meaningful—it just has to be made with intention and shared with people you care about. Every lopsided spiral and happy accident becomes part of the story you're telling with food.
Recipe FAQs
- → What gives these cookies their classic vanilla flavor?
Pure vanilla extract is added to the dough, infusing the cookies with a rich and aromatic vanilla taste.
- → How is the royal icing prepared and used?
Royal icing is made by mixing powdered sugar, meringue powder, vanilla, and water until smooth and glossy. It is colored as desired and piped onto cooled cookies for decoration.
- → Why is chilling the dough important before baking?
Chilling the dough firms it up, making it easier to roll out and cut precise shapes, and helps maintain the cookie's texture during baking.
- → Can these cookies be stored after decorating?
Yes, once the royal icing has fully set, cookies can be stored in an airtight container at room temperature for up to one week.
- → What tools are recommended for shaping and decorating?
Use cookie cutters for shaping, piping bags or squeeze bottles for icing application, and a wire rack for cooling.