 Pin it
 The first time I attempted a red velvet cake, I ended up with more food coloring on my ceiling than in the batter. My grandmother still talks about the pink speckled ceiling from that summer. But this Betty Boop version taught me patience and precision in equal measure.
I made this for my nieces birthday last year and she hugged me so hard she nearly knocked me over. Something about that playful Betty Boop heart makes people smile before they even take a bite.
Ingredients
- Cake flour: The lower protein content keeps the crumb tender and soft
- Cocoa powder: Just enough to deepen the red without overpowering the flavor
- Buttermilk: This creates tenderness and activates with baking soda for lift
- Red gel coloring: Gel delivers intense color without thinning your batter
- Cream cheese: Room temperature is non negotiable for silky smooth frosting
- Dark chocolate: The sharp bitterness cuts through all that sweetness beautifully
Tired of Takeout? 🥡
Get 10 meals you can make faster than delivery arrives. Seriously.
One email. No spam. Unsubscribe anytime.
Instructions
- Prep your pans and preheat:
- Grease those heart shaped pans thoroughly and line the bottoms with parchment paper while your oven warms to 350°F
- Whisk the dry ingredients:
- Combine cake flour cocoa powder baking powder baking soda and sea salt in a medium bowl
- Cream butter and sugar:
- Beat butter for a minute until creamy then gradually add sugar beating for 2 to 3 minutes until the mixture looks light and fluffy
- Add eggs one by one:
- Drop in each egg individually beating briefly after each one and scraping the bowl sides as needed
- Make it red:
- Stir in red gel food coloring vanilla extract and white vinegar until the batter turns that shocking crimson shade
- Combine wet and dry:
- Mix in one third of the dry ingredients then half the buttermilk repeating until everything is just incorporated
- The vinegar trick:
- Mix the remaining teaspoon of vinegar with baking soda in a small cup then fold it into the batter and watch it foam slightly
- Bake the layers:
- Divide batter evenly between pans smooth the tops and bake for 25 to 30 minutes until a toothpick comes out clean
- Cool completely:
- Let the cakes rest in pans for 10 minutes before turning them out onto wire racks to cool entirely
- Make the frosting:
- Beat cream cheese and butter for 2 minutes until smooth then gradually add powdered sugar salt and vanilla
- Assemble the cake:
- Level any domes with a serrated knife then layer frosting between cakes and apply a crumb coat before chilling
- Add the final layer:
- Spread a smooth finish or create swirls with your offset spatula then chill for 10 minutes
- Create the silhouette:
- Place your Betty Boop stencil under parchment paper and pipe or brush melted dark chocolate over the outline
- Set the chocolate:
- Let the silhouette harden completely at room temperature or pop it in the fridge for 10 minutes
- Final decoration:
- Carefully peel the chocolate from parchment and place it on the cake then add any extra decorations
- Chill and serve:
- Refrigerate the finished cake for 30 minutes then slice with a warm clean knife for neat portions
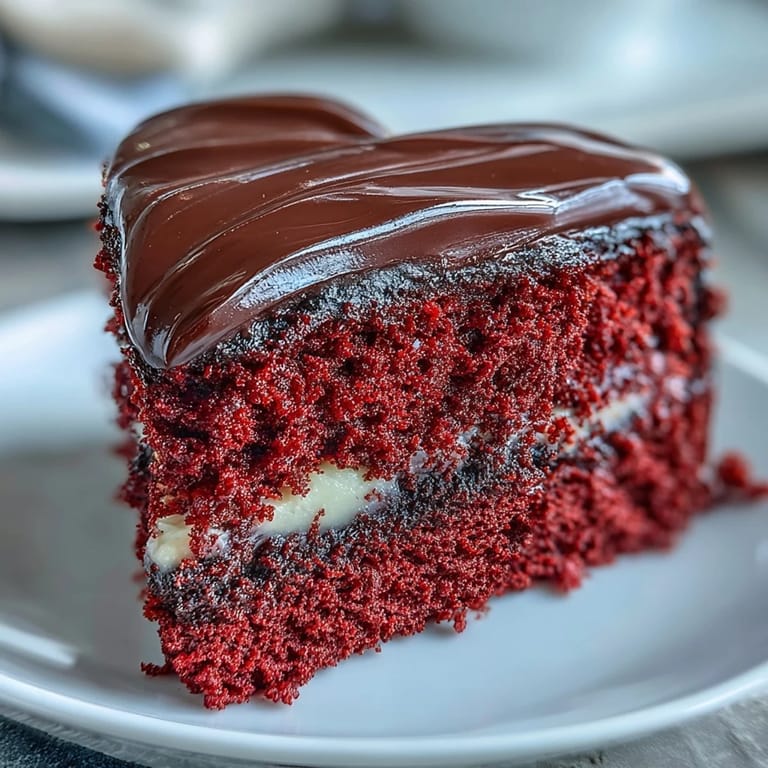
 Pin it
 My friend actually asked if I bought this cake from a bakery which I took as the highest compliment. The way that dark chocolate pops against the bright red frosting makes it look impossibly professional.
Getting That Vibrant Red
I have learned through many disappointing batches that liquid food coloring will never give you that deep velvety crimson. Gel coloring is concentrated enough to deliver intense color without adding extra liquid to your carefully balanced batter. Start with less than you think you need because you can always add more but you cannot take it back.
Mastering the Chocolate Silhouette
The first time I tried piping the Betty Boop outline I made her eyes too close together and she looked rather alarming. Practice your outline on a separate piece of parchment first and let yourself make mistakes without consequence. The chocolate needs to be completely cooled but still fluid enough to pipe smoothly and work quickly before it starts setting up in your bag.
Frosting Like a Pro
Heat your offset spatula under hot water then dry it thoroughly before smoothing the frosting for that glasslike finish. I also learned to refrigerate the frosted cake for at least 30 minutes before slicing which prevents the knife from dragging through all your hard work.
- Run your spatula under hot water between passes for extra smoothness
- Chill the cake before slicing to get clean edges
- Keep a warm damp cloth nearby to wipe chocolate smudges
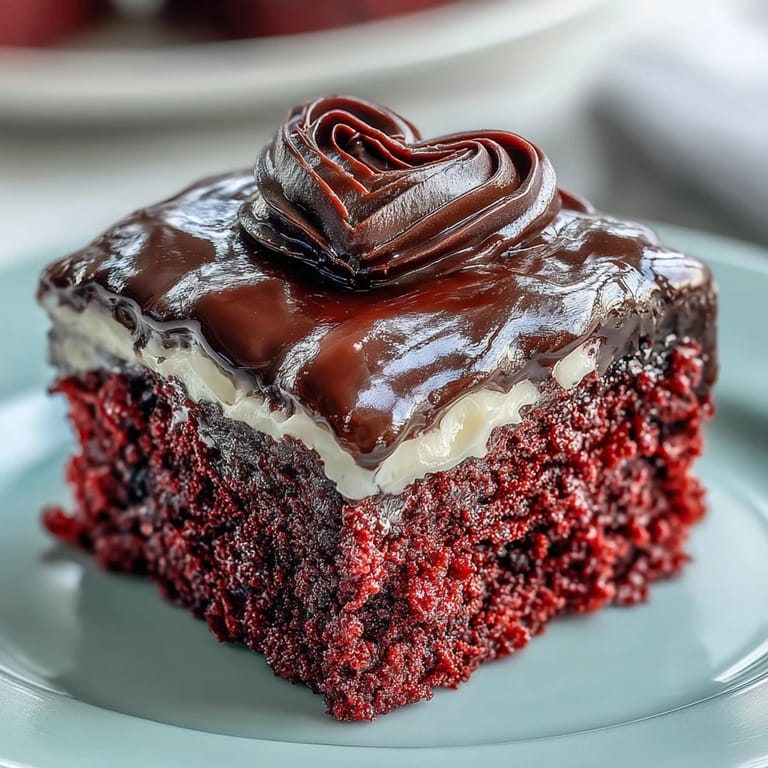
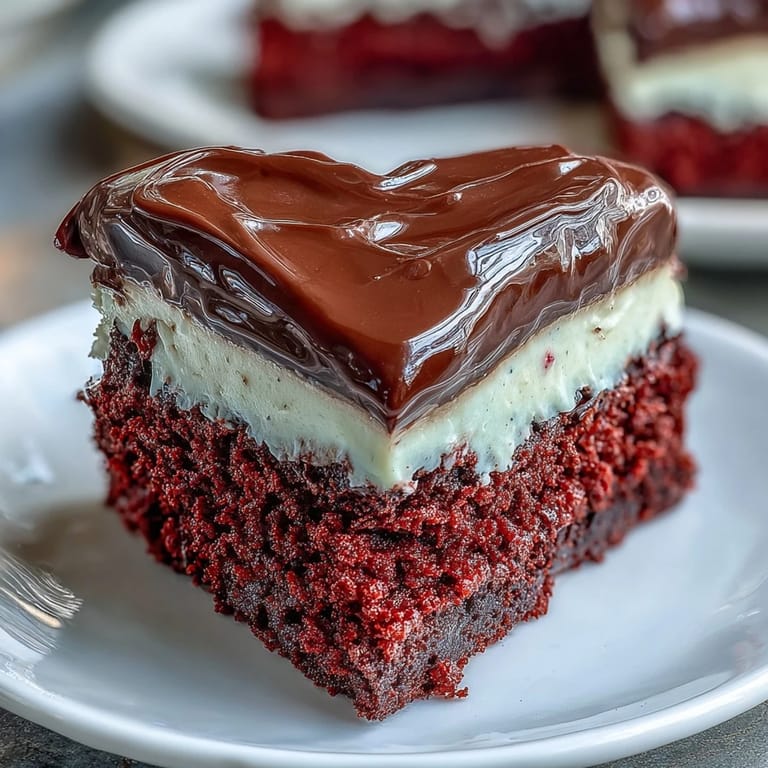 Pin it
 There is something magical about cutting into that bright red cake revealing the tender crumb inside. It never fails to make people happy.
Recipe FAQs
- → Why use gel food coloring instead of liquid?
Gel-based coloring provides the most vibrant red hue without adding excess liquid that could alter the batter consistency or affect how the cake rises.
- → Can I make the chocolate silhouette ahead of time?
Yes, prepare the dark chocolate silhouette up to 3 days in advance. Store flat between parchment paper in an airtight container at room temperature.
- → What if I don't have heart-shaped pans?
Bake in two 9-inch round pans, then cut cooled layers into hearts using a cardboard template. Or bake in 8-inch square pans and trim into hearts.
- → Why add vinegar to the batter?
White vinegar activates the baking soda, creating a slight chemical reaction that produces an exceptionally tender crumb and helps the red color develop more vibrantly.
- → How long does the finished cake keep?
Store covered in the refrigerator for up to 4 days. Bring to room temperature 30 minutes before serving for the best texture and flavor.
- → Can I use natural cocoa instead of Dutch-processed?
Natural unsweetened cocoa powder works perfectly here and provides the slight acidity needed to interact with the baking soda for proper rise.