 Pin it
 My college apartment had exactly one working oven rack and a tendency to set off smoke alarms at the slightest provocation. Despite these limitations, my roommates and I became obsessed with recreating campfire memories indoors. These s'mores bars emerged from a particularly rainy weekend when camping was definitely not happening. The whole building smelled like toasted marshmallows, and suddenly we were the most popular apartment on our floor.
I brought these to a summer potluck last year, and honestly, they disappeared before I could even grab a plate myself. My friend Sarah texted me the next morning demanding the recipe, claiming her boyfriend kept talking about them in his sleep. Since then, they have become my go-to when I need something that feels nostalgic but impressive.
Ingredients
- Graham cracker crumbs: These form the foundation of your crust, so do not crush them into dust, you want some texture left
- Unsalted butter: Melt it completely but let it cool slightly so it does not separate from the crumbs
- Granulated sugar: Just enough to bring out the natural sweetness in the graham crackers
- Semi-sweet chocolate chips: The perfect balance, milk chocolate can make these overly sweet while dark loses that classic childhood flavor
- Mini marshmallows: They melt more evenly and create that beautiful golden top we are all after
Tired of Takeout? 🥡
Get 10 meals you can make faster than delivery arrives. Seriously.
One email. No spam. Unsubscribe anytime.
Instructions
- Prep your pan like a professional:
- Line that baking dish with parchment paper, and let those ends hang over the sides, they will be your handles later when removing the bars.
- Build the foundation:
- Mix the crumbs, butter, and sugar until everything looks like wet sand, then press it into your pan with the bottom of a measuring cup for an even layer.
- Set the crust:
- Bake just until you can smell the graham crackers, about 8 minutes, but watch it closely, graham crackers go from perfectly toasted to burnt in seconds.
- Melt the chocolate layer:
- Scatter those chocolate chips over the warm crust and let the oven do the work, returning it for just 2 minutes until they are shiny and soft.
- Spread evenly:
- Use an offset spatula or the back of a spoon to gently smooth the chocolate into a uniform layer.
- Add the marshmallow magic:
- Scatter mini marshmallows across the chocolate, giving them a gentle press so they nestle in.
- Create the golden top:
- Bake another 10 to 12 minutes until marshmallows are puffed and golden in spots.
- The patience step:
- Cool completely, then chill for an hour so you can cut clean squares instead of pulling apart a gooey mess.
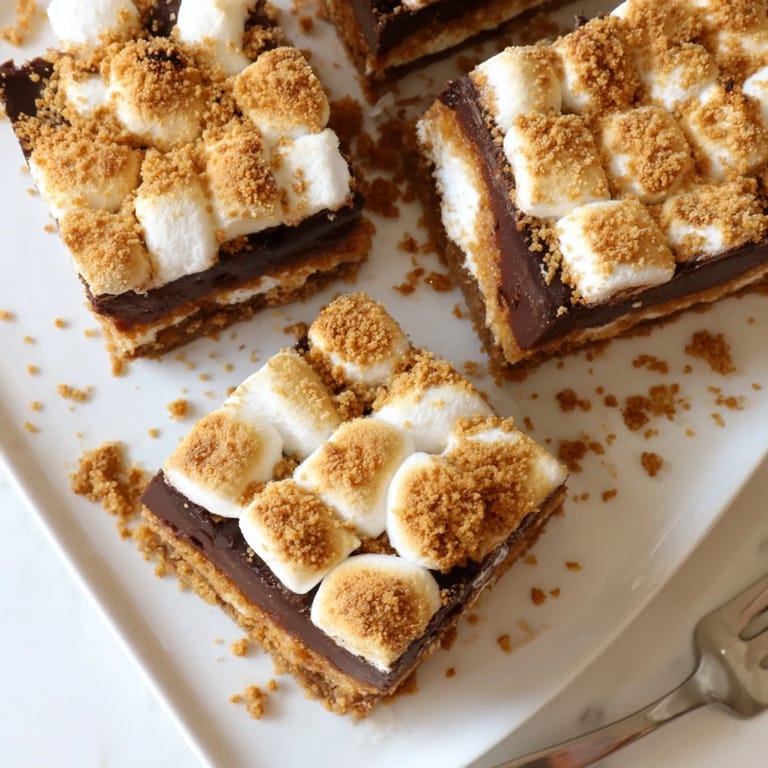
 Pin it
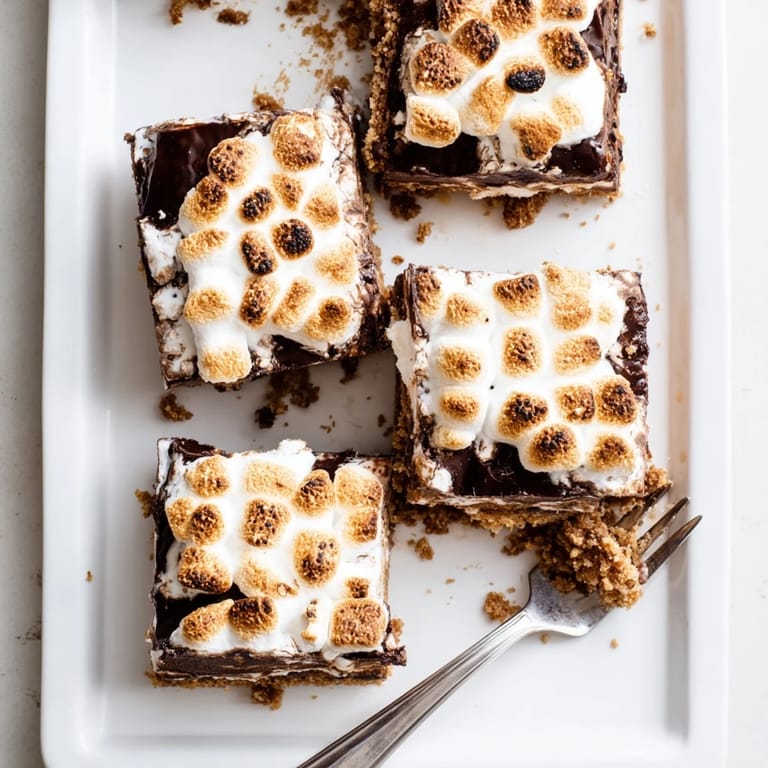
 My daughter helped me make these last weekend and insisted on arranging the marshmallows in a perfect grid. Her careful placement actually made for the most even browning I have ever achieved. Sometimes the perfectionist tendencies pay off.
Getting That Perfect Golden Top
The marshmallows can go from golden to burnt surprisingly fast. I have found that positioning the rack in the upper third of the oven helps them toast before the bottom overcooks. Keep your oven light on and watch through the door rather than opening it repeatedly.
Making It Your Own
A friend of mine adds crushed salted pretzels to the crust layer for a sweet and salty version that is absolutely addictive. Another swirls a bit of peanut butter into the chocolate before adding marshmallows. The base recipe is forgiving enough to handle creative twists.
Serving and Storage
These bars are at their absolute best slightly warm, when the chocolate still has that perfect give. That said, they keep remarkably well in an airtight container for up to three days. I actually prefer them cold straight from the refrigerator, the chocolate becomes firm and fudge-like.
- Use a sharp knife wiped clean between cuts for the neatest squares
- If serving at a party, consider cutting them smaller than expected because they are rich
- Leftovers can be frozen for up to a month, though I have never seen them last that long
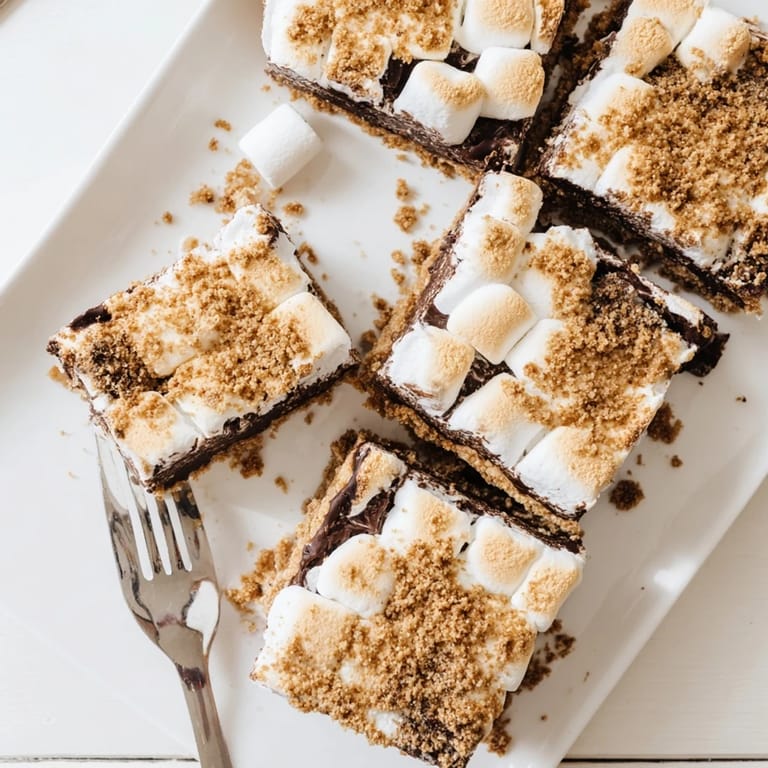
 Pin it
 There is something deeply satisfying about bringing campfire flavors into your kitchen, rain or shine. These bars might just become your new signature dessert.
Recipe FAQs
- → Can I make these ahead of time?
Absolutely! These bars actually improve when made a day ahead. Store in an airtight container at room temperature for up to 3 days, or refrigerate for up to a week. Bring to room temperature before serving for the best texture.
- → Why should I chill before cutting?
Chilling for 1 hour firms up the chocolate and marshmallow layers, making them much easier to cut cleanly. This prevents the marshmallow from sticking to your knife and helps maintain the distinct layers for picture-perfect squares.
- → Can I use different chocolate?
Yes! Semi-sweet chocolate provides a classic balance, but milk chocolate makes them sweeter and darker chocolate adds sophistication. You can also use chocolate bars chopped into pieces instead of chips for larger melty pockets.
- → How do I get the marshmallows extra toasty?
For deeply toasted marshmallows, broil for 1-2 minutes at the end of baking. Watch closely as they can go from golden to burnt quickly. Alternatively, use a kitchen torch to toast the tops after baking for extra caramelized flavor.
- → Can I freeze these bars?
Yes, freeze individual layers or whole bars wrapped tightly in plastic and foil for up to 3 months. Thaw overnight in the refrigerator. Note that the texture may be slightly softer after freezing, but they'll still taste delicious.